
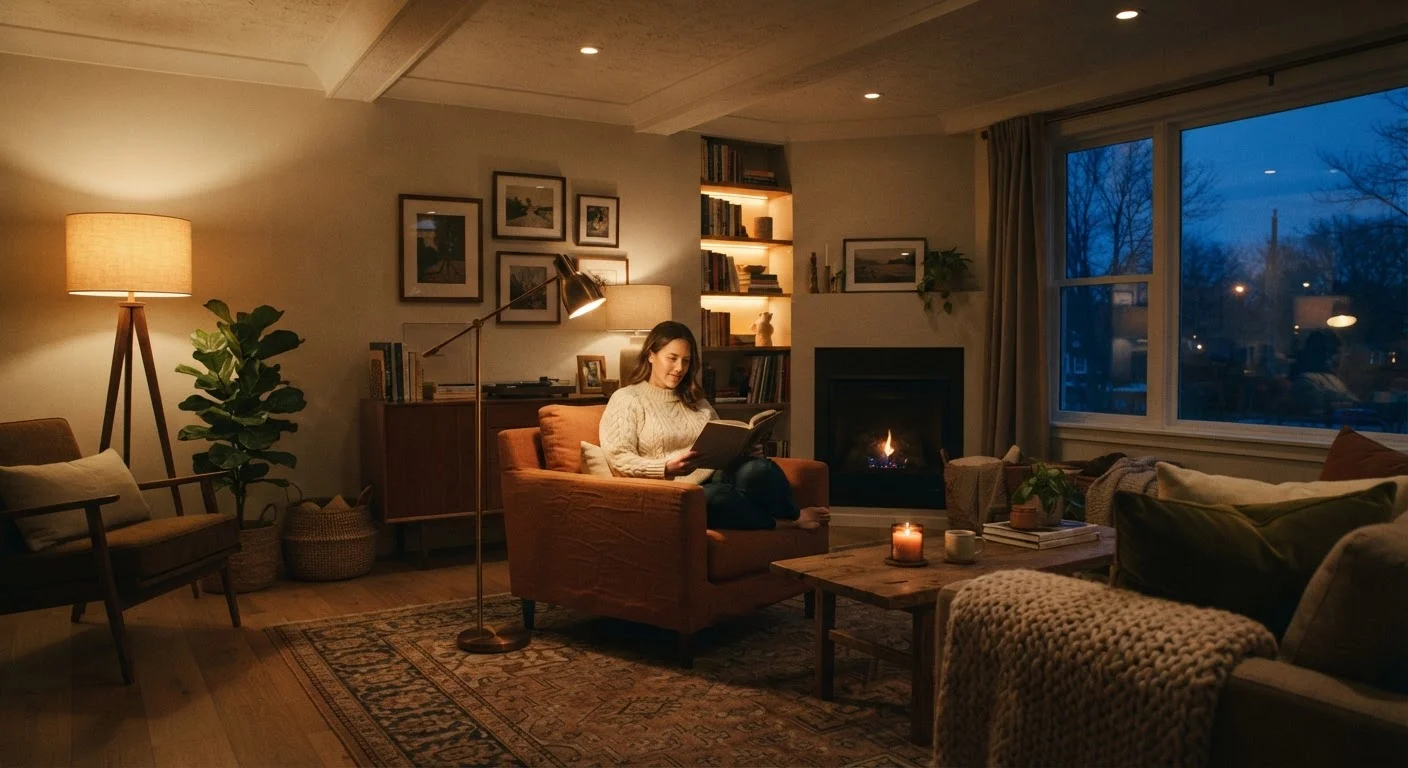
The Problem With a Single Overhead Fixture
Walk into most rooms in the average American home and you'll find the same setup: one ceiling fixture, usually centered, casting light straight down. It's the default - and it's one of the most common reasons rooms feel flat, harsh, or just a little off, even when the furniture and color choices are right.
Overhead-only lighting creates two specific problems. First, it produces strong shadows directly below objects and on people's faces, which makes the room feel clinical rather than comfortable. Second, it treats every corner and every activity equally - meaning you can't carve out a cozy reading nook or make a fireplace wall feel dramatic. Everything just gets the same wash of light.
This is exactly the problem that layered lighting is designed to solve. As part of the broader design fundamentals explored in creating a room that actually feels good to be in, light is one of the most powerful tools you have - and it costs far less to adjust than furniture or paint.
Start With a Lamp Before Anything Else
If your room currently relies on a single ceiling fixture, the fastest improvement you can make is adding a plug-in floor or table lamp - no installation required. Place it in a corner or beside seating to immediately introduce a second light layer. Once you see how much warmth it adds, building out the full three-layer system becomes much easier to visualize.
The Three Layers Explained
Understanding the three lighting types is the foundation of the whole approach.
Ambient Lighting
This is your base layer - the general illumination that replaces daylight when the sun goes down. Ceiling fixtures, flush mounts, recessed downlights, and chandeliers all fall into this category. Ambient light should be broad and relatively even, but it doesn't need to be bright. In fact, keeping it slightly dimmer than you might instinctively choose leaves room for the other two layers to do their job.
Task Lighting
Task lighting is focused and intentional. It goes wherever you need to see clearly: a pendant over a kitchen island, a reading lamp beside an armchair, an under-cabinet light strip above a workspace. The key difference from ambient light is directionality - task lighting points where you need it, not everywhere at once.
Accent Lighting
Accent lighting is the layer most people skip, and it's often the one that makes the biggest visual difference. Its job is to create contrast and draw the eye - highlighting a piece of artwork, washing light across a textured brick wall, or illuminating a bookshelf from above. Accent light adds depth and drama that no overhead fixture can replicate.
3-5
Light sources recommended per average room
Interior lighting designers generally suggest a minimum of three to five distinct light sources to achieve a fully layered, functional space.
2700K-3000K
Ideal bulb color temperature for living spaces
This warm white range is widely recommended by lighting designers for bedrooms and living rooms where comfort and ambiance matter most.
10-20%
Of light should typically come from accent sources
A common rule of thumb in residential lighting design is that accent lighting should be roughly 10 to 20 percent of total illumination in a space.
Putting It All Together Room by Room
The proportions and priorities of each layer shift depending on how a room is used.
In a living room, ambient light can be relatively soft since you're rarely doing precision work there. Add a floor lamp or two for reading, and use accent lighting to highlight the features you want to show off - art, architectural details, or plants. If you keep indoor plants, our guide on interior plant placement is worth reading alongside your lighting plan, since light placement affects plant health too.
In a kitchen, the balance tips toward task lighting. Under-cabinet strips, pendants over work surfaces, and good ambient overhead coverage all matter more than decorative accents. In a bedroom, the opposite is often true - soft ambient light, a couple of focused bedside task lamps, and perhaps a subtle accent light to add warmth at night.
The color temperature of your bulbs matters here too. For a consistent feel throughout a space, understanding warm versus cool light will help you choose bulbs that complement your room's existing palette and natural light conditions.
Building Layers Without a Full Renovation
Here's the good news: you almost certainly don't need an electrician to get started. Most layered lighting setups can be built incrementally using plug-in fixtures.
- Start with what's missing. If your room only has overhead light, your first purchase should be a floor or table lamp - instantly adding a second layer.
- Add accent lighting last. Picture lights, small directional spotlights, and LED strip lights can be added without any wiring changes and make a surprising difference.
- Install dimmers where possible. Even a single dimmer on your main overhead circuit gives you meaningful control. This does require an electrician if you're replacing a standard switch, but it's a small job.
- Think in zones, not switches. The goal is to be able to turn on just your accent lights and a single lamp for a quiet evening - without having everything blazing at once.
If you're decorating a room from scratch, starting from a blank slate is a helpful companion guide that walks through how lighting fits into the broader decorating process from the very beginning.
Layered lighting doesn't require a big budget or a single bold move. It rewards patience and a willingness to add one source at a time until the room starts to feel - and function - the way you actually want it to.