Why Tire Pressure Is Worth Your Attention
Tire pressure is one of those maintenance items that's easy to overlook - until something goes wrong. Underinflated tires wear faster on the outer edges, reduce your fuel economy, and make your car harder to handle in an emergency stop. Overinflated tires wear out in the center, give you a rougher ride, and are more prone to blowouts on rough road surfaces.
The good news: checking and correcting tire pressure is genuinely quick and costs almost nothing. If you're building better habits around your vehicle, this task fits naturally into a broader routine - our pre-trip checks guide shows you how it fits with other fast inspections before you drive.
One thing that surprises many drivers: tires lose air on their own. A typical tire loses roughly 1 PSI (pound per square inch) per month under normal conditions, and cold weather accelerates that - tire pressure drops about 1 PSI for every 10°F drop in outside temperature. That makes this a check worth doing at least once a month, not just when a warning light appears.
Check Pressure Monthly, Not Just by Feel
A tire can lose 10 or more PSI and still look fine to the naked eye - visually flat tires are already severely underinflated. Don't rely on appearance alone. A quick monthly gauge check is the only reliable way to catch pressure loss before it causes uneven wear or affects your handling.
What You Need Before You Start
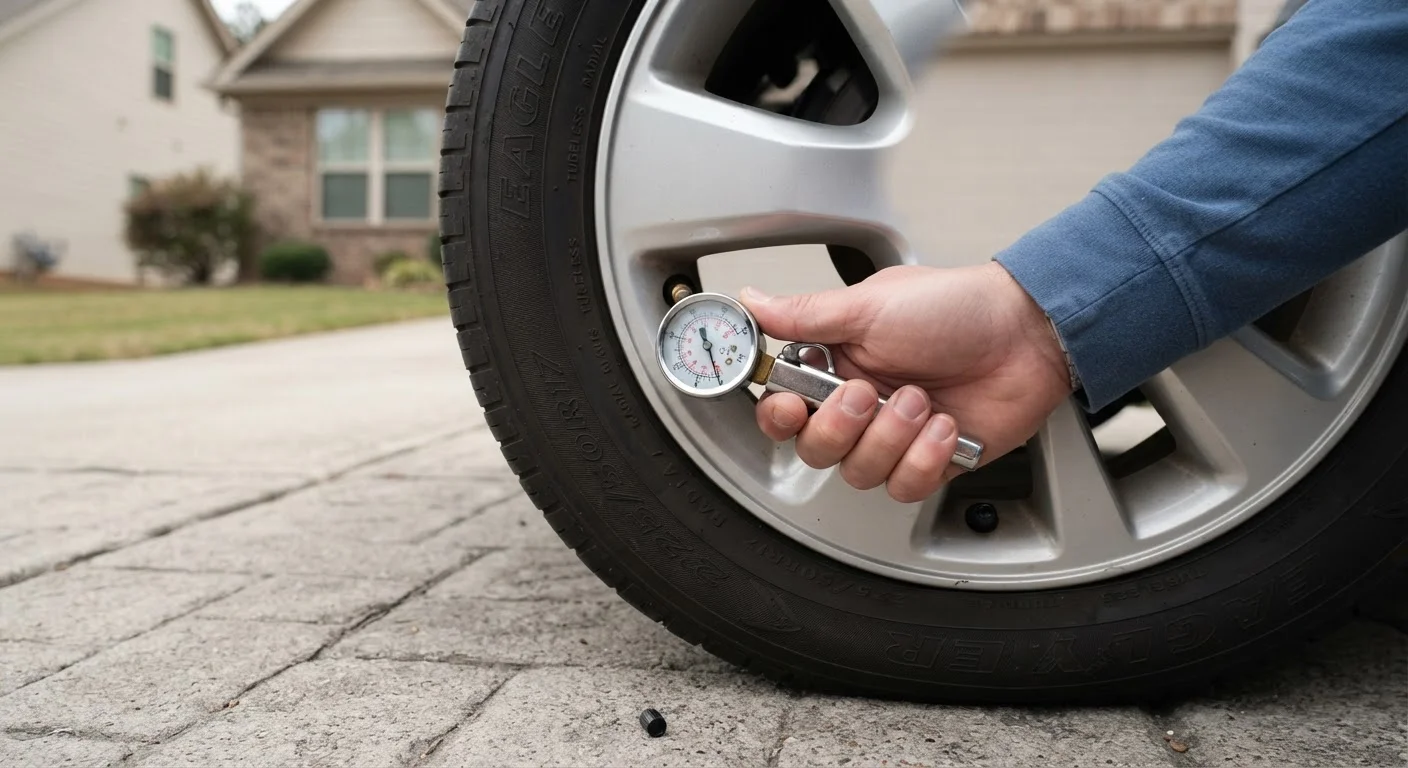
You don't need much. A tire pressure gauge is the only tool required - digital models are easy to read, but a simple stick-style gauge works just as well. Most gas stations also have air machines with built-in gauges if you don't own one yet.
You'll also want to know your vehicle's correct tire pressure. That number is printed on a sticker inside the driver's door jamb - look for it on the door frame or the edge of the door itself. Do not use the pressure number molded into the tire sidewall; that figure is the maximum the tire can hold, not the recommended operating pressure for your car.
What you will need
Tire pressure gauge
Measures the air pressure inside each tire so you know whether to add or release air.
Portable air compressor
Allows you to add air to underinflated tires at home without needing to drive to a gas station.
Pen or small tool for releasing air
Used to depress the center pin of a valve stem to release air from an overinflated tire.
How to Check and Adjust Your Tire Pressure
Follow these steps in order. The whole process typically takes five to fifteen minutes depending on how many tires need adjustment.
Check tires when they're cold
Park your car and let it sit for at least three hours before checking pressure, or check first thing in the morning before driving. Heat from driving expands the air inside your tires, which raises the reading and makes it look like you have more pressure than you actually do. Cold readings give you an accurate picture.
Find your recommended PSI
Open the driver's door and look for a sticker on the door jamb or door frame edge. It will list the recommended tire pressure in PSI for your front and rear tires - these can differ, so check both. Keep this number in mind throughout the process.
Remove the valve cap and take a reading
Locate the valve stem on the inside edge of the wheel - it's a short rubber or metal nub. Unscrew the small cap and set it somewhere safe. Press the open end of your gauge firmly and straight onto the valve stem. You should get a quick, steady reading. If air is hissing out, reposition the gauge until it seals properly.
Add or release air as needed
If the reading is below your target PSI, attach an air hose to the valve stem and add air in short bursts, rechecking frequently. If the reading is too high, use the small pin on the back of your gauge (or a pen cap) to press the center of the valve stem and release air in small amounts. Recheck after each adjustment until you hit your target.
Replace the valve cap and repeat on all tires
Screw the valve cap back on snugly - it keeps dust and moisture out of the valve. Repeat the process on all four tires, including the spare if your vehicle has a full-size one. Spare tires are often neglected and may be low when you actually need them.
For a deeper look at tire care beyond pressure - including tread depth, rotation schedules, and when to replace - see our complete tire care guide.
Keeping Up With It Year-Round
Once you've done it once, the process becomes second nature. A monthly check is a reasonable habit for most drivers. If you live somewhere with significant seasonal temperature swings, pay extra attention when the weather shifts - especially heading into winter. Our winter driving preparation checklist covers tire pressure alongside other cold-weather checks worth doing before temperatures drop.
If your dashboard shows a TPMS warning light, don't dismiss it. That light typically comes on when a tire is 25% or more below the recommended pressure - which is already significant. Check all four tires promptly and add air as needed. If the light stays on after correcting the pressure, have a mechanic take a look; it may indicate a slow leak or a sensor issue.
For a fuller picture of the routine checks that protect your vehicle long-term, the car ownership basics guide is a good starting point for drivers who want to feel more confident managing their own vehicle.